
Key Highlights
- Always wear protective gear, including an N95 mask and gloves, before attempting to clean black mould.
- Contain the area to prevent spores from spreading to other rooms in your home.
- Avoid using harsh bleach on porous surfaces, as it can damage paint and fail to kill roots.
- Ensuring the wall is completely dry after cleaning is the most important step in preventing regrowth.
- Homeowners should consult professional mould cleaning services in Singapore for large infestations.
Introduction
Black mould on bedroom walls or bathroom ceilings can be alarming, especially when it is linked to health concerns, unpleasant odours, and the risk of spreading quickly in humid environments. While it may be tempting to use harsh chemicals or scrub the affected area aggressively, improper cleaning methods can damage paint, ruin wallpaper, and disperse mould spores to other parts of the home, making the problem worse. Safe black mould removal requires the right techniques and careful handling, particularly in Singapore’s consistently humid climate where mould thrives. By understanding how to remove black mould properly, homeowners can remove mould effectively while protecting their walls from permanent structural or cosmetic damage.
Preparation and Safety First
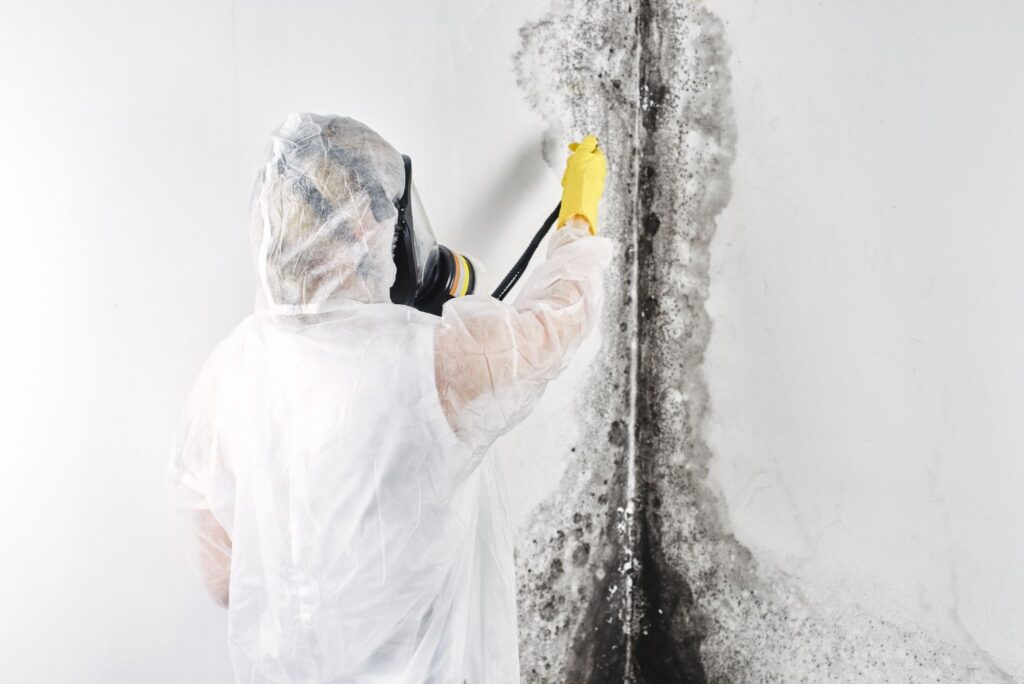
Before you even touch the affected area, you must protect yourself. Mould spores are easily disturbed and can be inhaled, leading to allergic reactions or respiratory distress. You should wear an N95 respirator mask, rubber gloves, and safety goggles. It is also wise to seal off the room by closing doors and covering vents with plastic sheeting. This containment prevents the disturbed spores from drifting into the kitchen or living areas, which could lead to secondary infestations.
The next step in preparation is to identify the wall’s material. Painted drywall, concrete, and wallpaper all react differently to cleaning agents. If you are unsure about a product, always perform a small patch test in an inconspicuous corner. This initial caution ensures that you do not end up with a large, discoloured patch that is even more unsightly than the original mould. Proper preparation is the foundation of any successful cleaning project and should never be skipped.
Choosing the Right Cleaning Solution
Many people mistakenly believe that bleach is the best answer for how to remove black mould. While bleach is effective at removing the dark stain, it often fails to kill the fungus’s roots or hyphae on porous surfaces such as drywall. Furthermore, bleach is highly corrosive and can easily ruin the finish of your paintwork. Instead, consider using a mixture of white vinegar and water, or a specialised antimicrobial cleaner designed for home use. Vinegar is mildly acidic and can kill up to 82% of mould species without damaging most wall finishes.
For stubborn stains, homeowners can apply a paste made of baking soda and water to the area, which provides a gentle abrasive action that lifts the fungus without heavy scrubbing. The goal is to neutralise the fungus while keeping the moisture levels as low as possible. If the infestation appears deep-seated or covers a large area, it may be time to seek mould cleaning services in Singapore to handle the situation with industrial-grade, non-damaging solutions.
The Cleaning and Wiping Technique
Once you have your solution, apply it gently using a spray bottle or a damp cloth. Do not soak the wall, as excess water will only seep deeper into the substrate and encourage more growth later. Allow the solution to sit for 15 to 30 minutes, which gives the active ingredients time to break down the mould’s cellular structure. When you are ready to wipe, use a disposable microfibre cloth or paper towels.
The motion is just as important as the solution; use a gentle dabbing or wiping motion rather than vigorous scrubbing. Scrubbing can push the spores deeper into the wall’s pores and can also scuff the paint. Work from the outside of the patch toward the centre to keep the contamination contained. As soon as a cloth becomes dirty, dispose of it in a sealed bag and use a fresh one, which prevents cross-contamination and ensures that you are actually removing the fungus rather than just moving it around the surface.
Post-Cleaning Drying and Prevention
The final and most crucial step is the drying phase. Mould cannot survive without moisture. If you leave the wall damp after cleaning, you have essentially created a perfect nursery for the remaining spores to thrive. Use a clean, dry towel to blot away any remaining moisture, and then use a fan or a dehumidifier to ensure the area is bone-dry. In Singapore, opening windows might help, but when it is rainy, it is better to rely on air conditioning or specialised drying equipment.
Once the area is dry, monitor it closely for several days. If the spots reappear, it indicates that the roots are deep within the wall and require professional intervention. To prevent a recurrence, consider applying a mould-resistant primer or paint once the area is fully cleared. Keeping furniture a few centimetres away from the wall to allow for airflow can also make a significant difference. If the problem persists across multiple rooms, engaging professional mould cleaning services in Singapore can provide a more permanent solution through deep-cleaning and air purification.
Conclusion
Removing black mould does not have to result in a ruined wall or a damaged home. By taking a methodical, safety-conscious approach, you can effectively eliminate fungal growth while preserving your interior finishes. The key is to act quickly but carefully, using the right tools for the job. Remember that cleaning is only half the battle; the real victory lies in keeping the area dry and well-ventilated to ensure the mould never has a reason to return.
If you are struggling with a persistent mould problem that DIY methods cannot fix, contact Mould Guru for expert assistance and long-term prevention.