

Creating one good image is often easier than creating a coherent social media series. A product launch may need a hero post, a detail image, a reminder, and a portrait version for another placement. When every prompt starts from scratch, lighting, color, and even the product itself can change between posts.
For creators exploring reference-based production, Whisk AI offers browser-based image generation and editing with text and image inputs. Its reference workflow separates subject, scene, and style, providing a useful starting point for organizing visual direction. A consistent series still depends on a clear brief and a person checking what each generated image actually shows.
The central decision is simple: define what stays fixed before deciding what changes. That gives every new image a relationship to the rest of the campaign.
Build a Small Visual Rulebook
A social media image workflow needs more than a reusable prompt. It needs a compact rulebook that someone else could follow without interpreting the brand from memory.
Start with four categories. Subject identity covers the shape and recognizable details of a product or recurring character. Visual treatment covers palette, light, and surface texture. Composition covers framing, subject size, and space for later copy. Message defines the single job of each post.
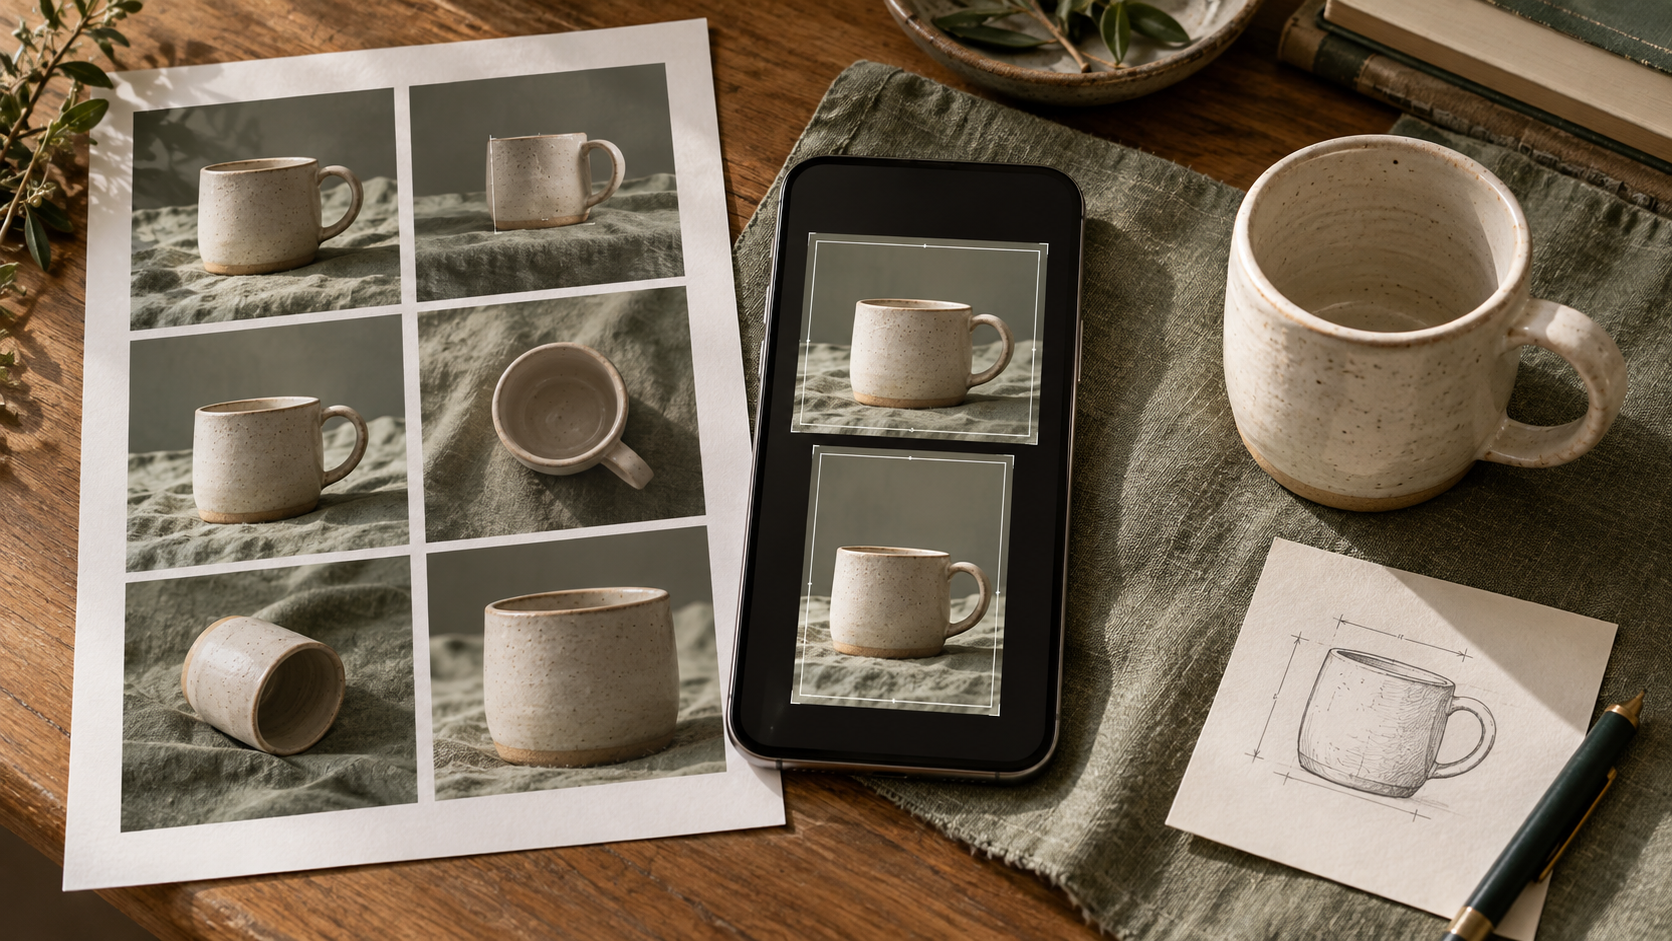
For a handmade mug launch, those rules might specify a cream ceramic finish, a small asymmetric handle, soft daylight, and sage fabric. The post about the handle can use a close view; the launch image can show the full object. Both should still depict the same mug.
Visual consistency means preserving the decisions that identify a series while allowing each image to serve a different purpose. Repeating the same composition everywhere is not necessary.
Separate a Style Reference From a Product Reference
A style reference helps communicate a treatment such as warm highlights, restrained colors, or a painted finish. A product reference provides evidence of what the object looks like. They have different jobs, and a model may interpret either imperfectly.
Keep a clear original product photograph alongside the working files. If an output changes the handle, material, closure, or packaging, a matching color palette does not make it accurate. For an actual sales image, use a controlled photo-editing or compositing approach when generation cannot preserve the relevant detail.
Prepare a separate record for text and graphics. Product names, prices, dates, and logos should come from approved assets and copy. Add and check them in a layout editor rather than trusting an attractive generated image to reproduce them correctly.
A Repeatable AI Image Workflow for Social Posts
This process keeps a small campaign organized while leaving room to adapt images for different messages and layouts.
Step 1: Make One Brief for the Whole Series
Gather the original subject photo, an approved visual reference, a short palette description, and the messages the series must communicate. Write down the details that must remain unchanged and the elements that may vary.
Check the references for contradictions. If one image uses hard flash and another uses soft window light, choose the intended direction before generating. Save the brief with the references so future revisions start from the same decisions.
Step 2: Establish a Base Image
Use the inputs to create a first composition that can represent the series. Review subject accuracy, lighting, background, and usable space before treating it as the visual anchor.
If the result looks appealing but changes a defining feature, revise or reject it. Do not approve a flawed base simply because the rest of the campaign can imitate it. Record the selected inputs, model choice, and instructions where the tool makes those settings available.
Step 3: Change One Variable for Each New Post
Keep the approved references and fixed rules while changing the detail needed for the next message. A product overview might become a closer composition, or the same scene might gain more empty space for a short announcement.
Compare each variation with the original subject and the base image. Judge whether the intended change happened without introducing an unwanted one. If several features drift, return to the last approved reference set and simplify the instruction.
Step 4: Finish, Crop, and Check the Series Together
Move approved images into a layout editor for typography, logos, and precise cropping. Preview each destination format on a phone-sized canvas. Keep the essential subject intact and check whether any added text is readable.
Then view the series as a contact sheet. A color or lighting change that is easy to miss in isolation often becomes obvious beside neighboring posts. Fix the outlier before export, and keep final files separate from experiments.
Worked Example: A Small Ceramic Mug Launch
Imagine a maker planning a three-post launch for a cream mug. This is a fictional brief illustrating the process, not a customer case study or a claim about measured results.
The first post introduces the object on a simple surface. The second draws attention to its handle and glaze. The third places it in a quiet breakfast setting. Across the brief, the mug shape, glaze color, daylight direction, and restrained background palette stay fixed.
Review would reject an image that adds a second handle or changes a matte finish into a glossy one. It would also flag a beautiful breakfast scene if the mug becomes too small to identify. A portrait crop that cuts through the handle needs a layout revision even when the underlying image is acceptable.
The final review has two separate questions: does the series look related, and does each image remain accurate? Passing the first question never excuses failing the second. When the exact product cannot be preserved, retain the real product photo and use generated material only where it can be reviewed reliably, such as an exploratory background concept.
AI Exploration vs Templates and Product Photography
This comparison separates visual exploration from precise finishing, helping creators choose the right method for each part of a social campaign.
| Criteria | Whisk AI reference workflow | Reusable design templates | Photography and manual editing |
| Starting Point | Reference images and written instructions | Approved layouts and existing assets | Real subjects and captured photographs |
| Best Use Case | Explore backgrounds and visual directions | Repeat typography and campaign layouts | Show exact product details clearly |
| Main Skill | Visual direction and careful review | Layout judgment and copy editing | Lighting, capture, and retouching skills |
| Series Control | Reuse inputs and review variations | Preserve explicit layout and styling | Control real subjects and lighting |
| Final Text | Add approved copy during finishing | Place editable text in templates | Add text during final layout |
| Main Limitation | Generated subject details can drift | Repetition can feel visually rigid | Production requires setup and resources |
A reference-led workflow can support visual exploration, while templates and manual editing provide more direct control over final layout. The methods can be combined within one campaign.
Adapt the Method to the Content
For product launches, preserve the real item’s defining features and use each post to answer a different buyer question. Decorative variation should not invent a feature that the product does not have.
For educational series, reuse the palette, illustration treatment, and layout rules so a sequence feels connected. Add diagrams, labels, and instructional text through a process that allows precise factual review.
For creator or event announcements, maintain a consistent visual atmosphere while changing the message. If a real person appears, check likeness and permission, and use approved text for dates, venues, and names.
Make Approval Part of the Workflow
Before publishing, check the subject against the original, review the crop at its actual display size, proofread added text, and write useful alt text where the platform supports it. Confirm that reference files are appropriate to use and review the current terms of the tools involved.
This approach is particularly useful for solo creators and small teams producing related posts over time. It organizes their visual decisions without promising that generation will preserve every detail. The series is ready when its images work together, each post has a clear purpose, and someone has checked the details viewers will rely on.